I haven’t blogged about Stina for some time. This was mainly because there are only so many ways you can say “we are still working on the short film” before it gets a bit dull, particularly as the most exciting parts about the new film we want to keep under wraps until it’s out 😉
However, we are now “animation final” for all the animation and are getting close to starting the final renders off and are are just giving the shaders a final “spruce up” before sending it all off . We are scheduled to have an in-uni dedicated render farm after Christmas, so will probably start rendering when that’s up and running.
Today i just wanted to chat a bit about shader development. For those unfamiliar with the complex world of CGI, a “shader” is a computer algorithm that allows a 3d model to have surface properties that dictate the way it reacts to light. This includes the base colour of the object, often a painted or photographic image, the intensity and colour of the reflections and, particularly in the context of skin, the translucency of the object and the way that light changes colour as it hits different levels of depth. (this is how that unique “skin tone” effect is created) Also any tiny sculptural details such as pores or scratches that are too small to model.
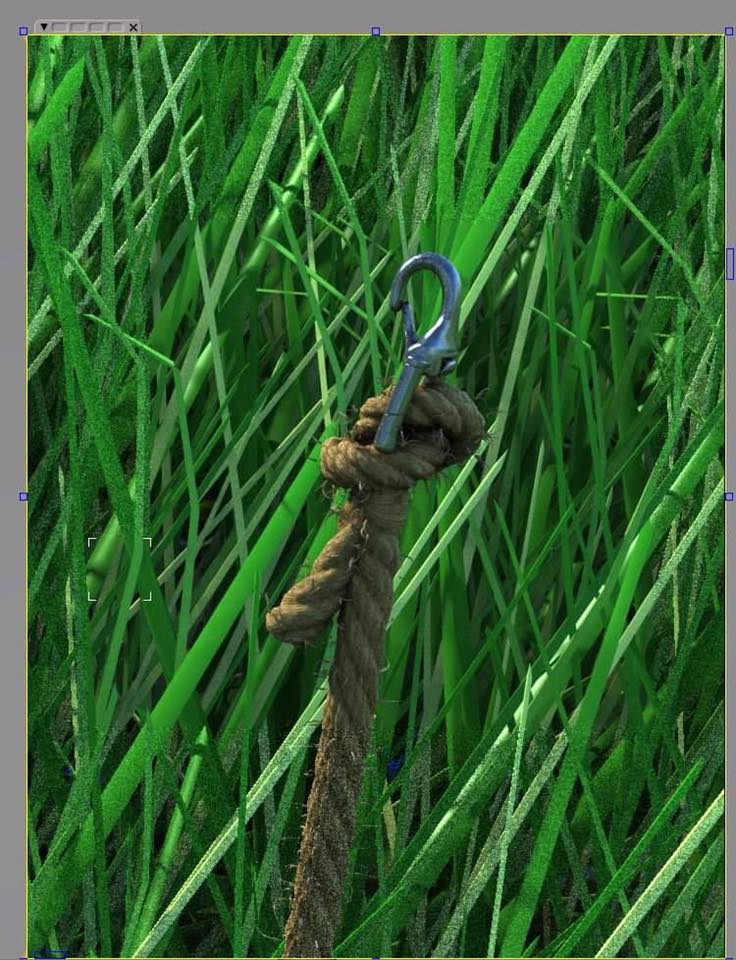
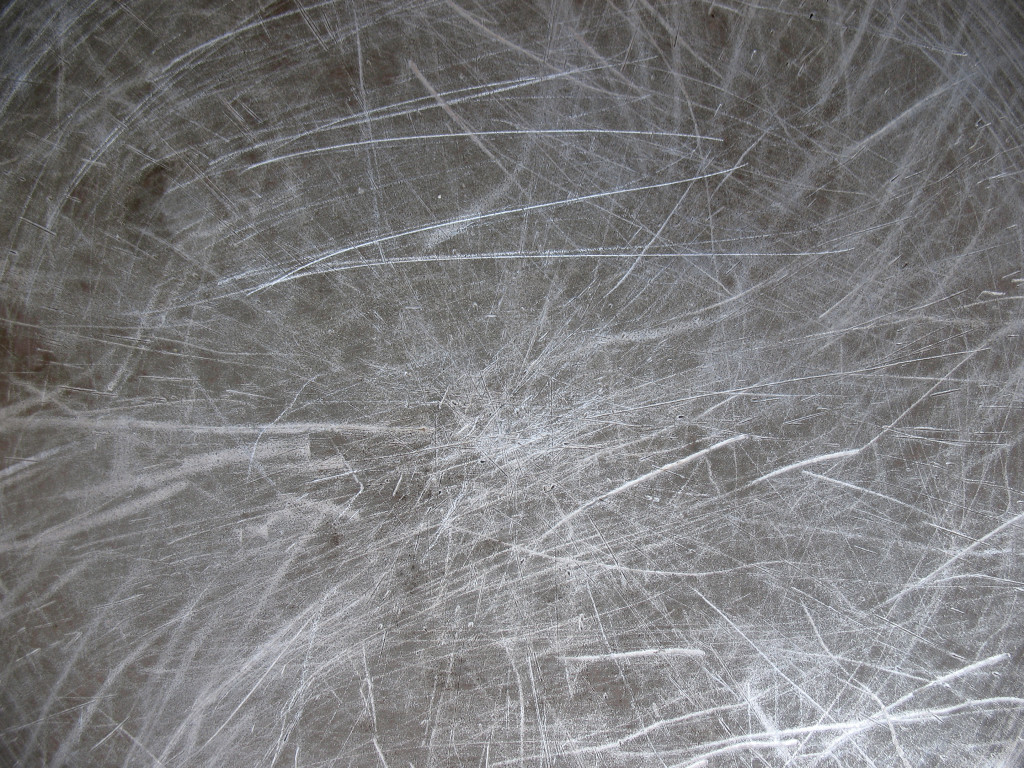
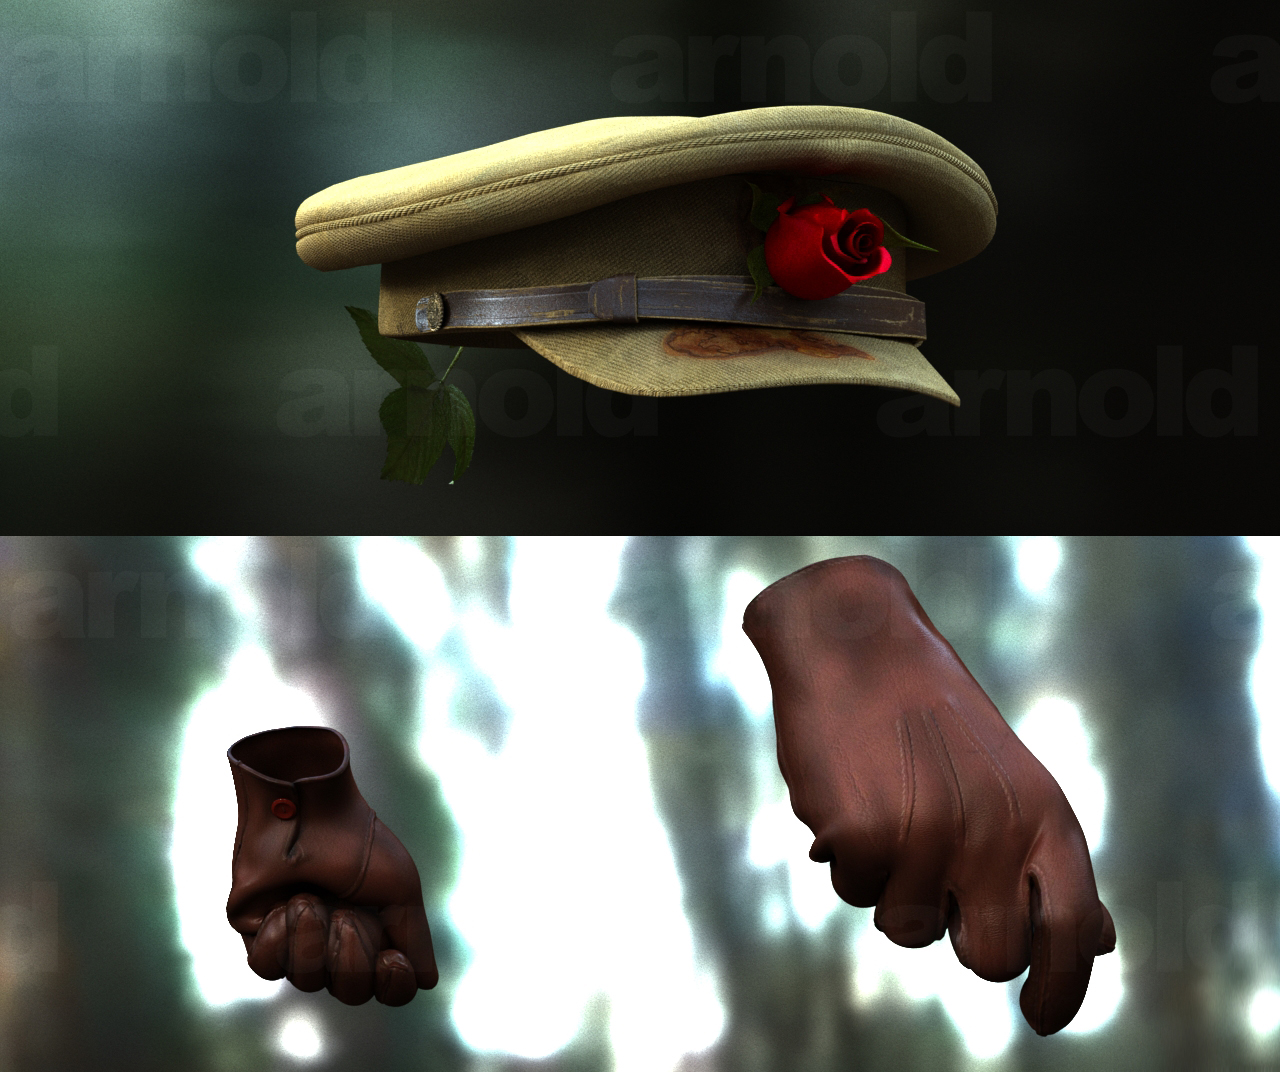
This image above is only partially rendered, you can see the areas that are still being calculated look noisey and incomplete. For shaders such as these, although a lot simpler than skin, there is still a lot more work needed than meets the eye to add a level of textural realism. The buckle for example is actually made up of 2 shaders blended together; One is made to look like rust, using a painted image of rust colours combined with a very rough , reflective surface. And the other is a shiny metallic surface that reflects everything around it. These two are blended together. A “mask” is used to tell the renderer which shader to use where on the surface. In this case an image of scratches was used as a mask:
The image was colour corrected, so the contrast made the scratches distinct from the background metal and it was used as a mask to simulate the chrome metal plating being scrapped off the buckle, causing the ferrous metal beneath to rust. To add even more realism an “ambient occlusion” map was created, and this was added in addition to the scratch mask. This allowed rust to be visible in the areas where the surface joins are, as liquid would be more likely to settle and corrode in these areas over time. An “ambient occlusion” map is a texture created that assigns a colour (normally black) for areas that are in creases and another colour (normaly white) for areas that are clear of any other surfaces. an example here:
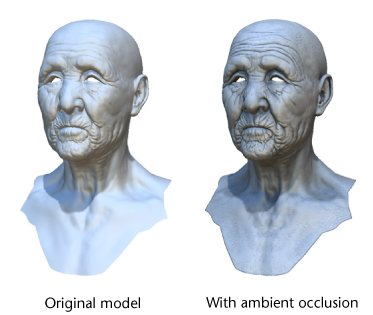
You can see here that ambient occlusion creates dark areas in the creases, perfect for blending in a rusty material that has formed into the cracks and scratches. You can also see the effect used here in the door handle and bindings used in the opening shot of our short film:
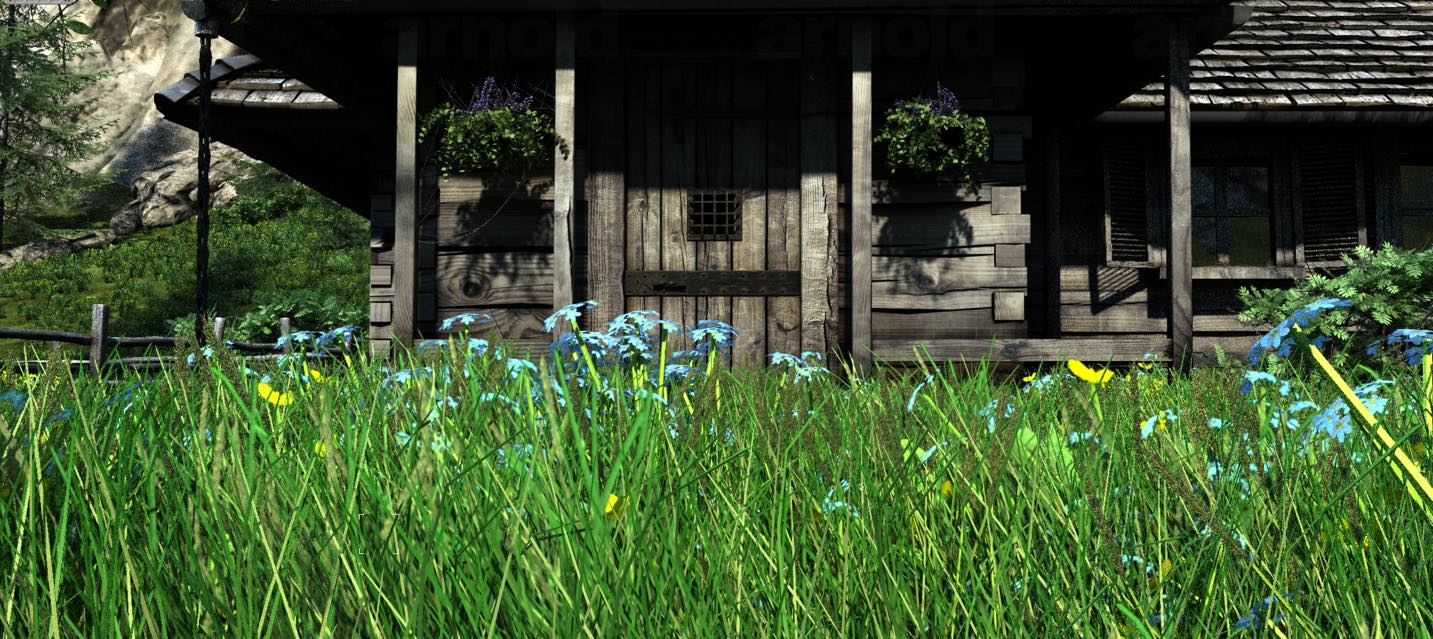
If you look carefully you can also see the same effect was used in the wood shader. The wood is lighter and bleached in areas that would get a lot more sun, and darker with more color saturation; as if the wood has retained its original staining in areas that would get less harsh sunlight. Although this may seem like a lot of unnecessary trouble to go to, these elements all add up to create a feel and atmosphere that although not immediately noticed, are registered subconsciously and if absent can make the render look very “CG”.
So the hardest shader by far to make on a project like this is the “hero” skin shader. And particularly tricky for us is hitting the right mix of realism and stylization. This is something i suspect we will be tweaking right up until we press “render” on the final film (or should i say “composite”, as we will probably fiddle with things a lot after we’ve rendered them, but that’s for another day)
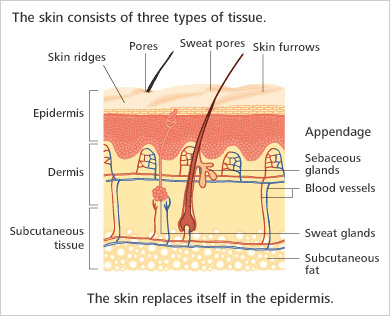
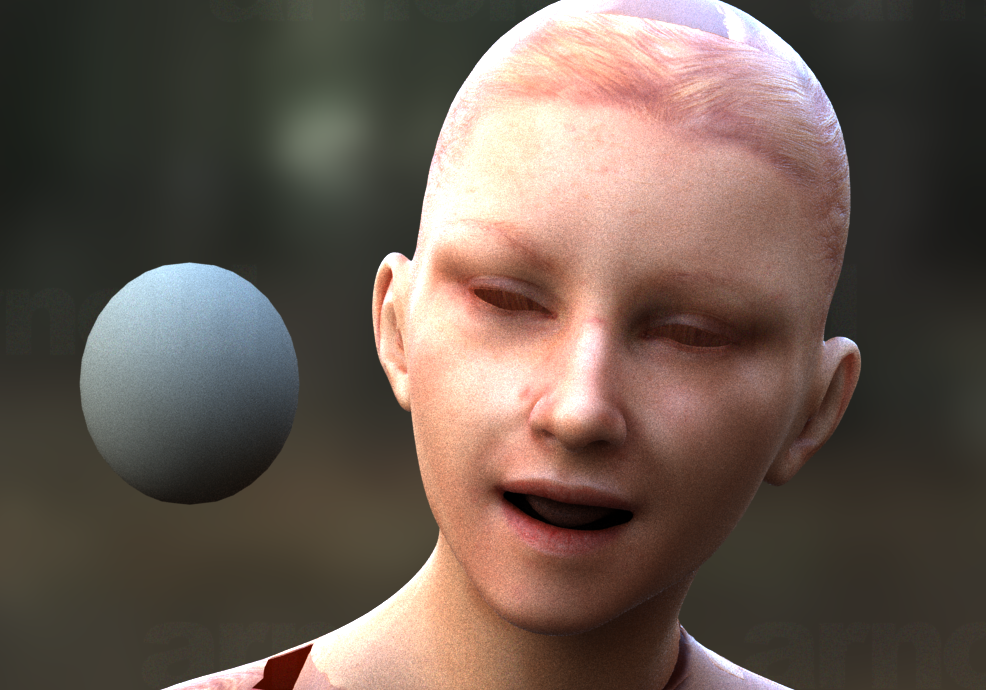
The main tool in our shader box of tricks for skin is “sub-surface-scattering” or SSS for short. This technique usually involves creating 3 different colour maps to represent cross sections of the skins colour at different depths. In the case of skin: epidermis, dermis and subcutaneous:
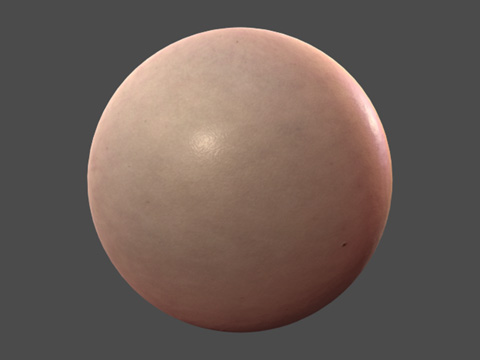
In a basic rendered ball example, using just simple coloured textures for each of these layers a CGI skin shader looks like this:
However, to simulate the appearance of real skin on a person requires a lot of observational skill. You have to pick out what colour goes at what depth and where. And what part of the colour is actually not the skin itself, but the result of the oily resdue produced by the pores that permanently coat the skins surface, as this creates a slightly pearlescent sheen. This isn’t a new battle, artist having been obsessively trying to capture the various qualities of skin in art for hundreds of years:
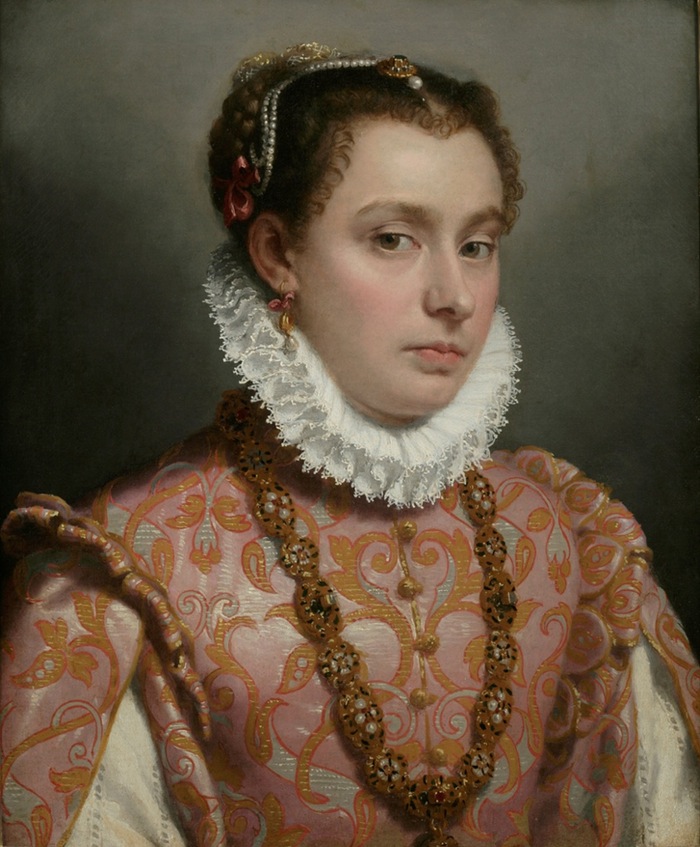
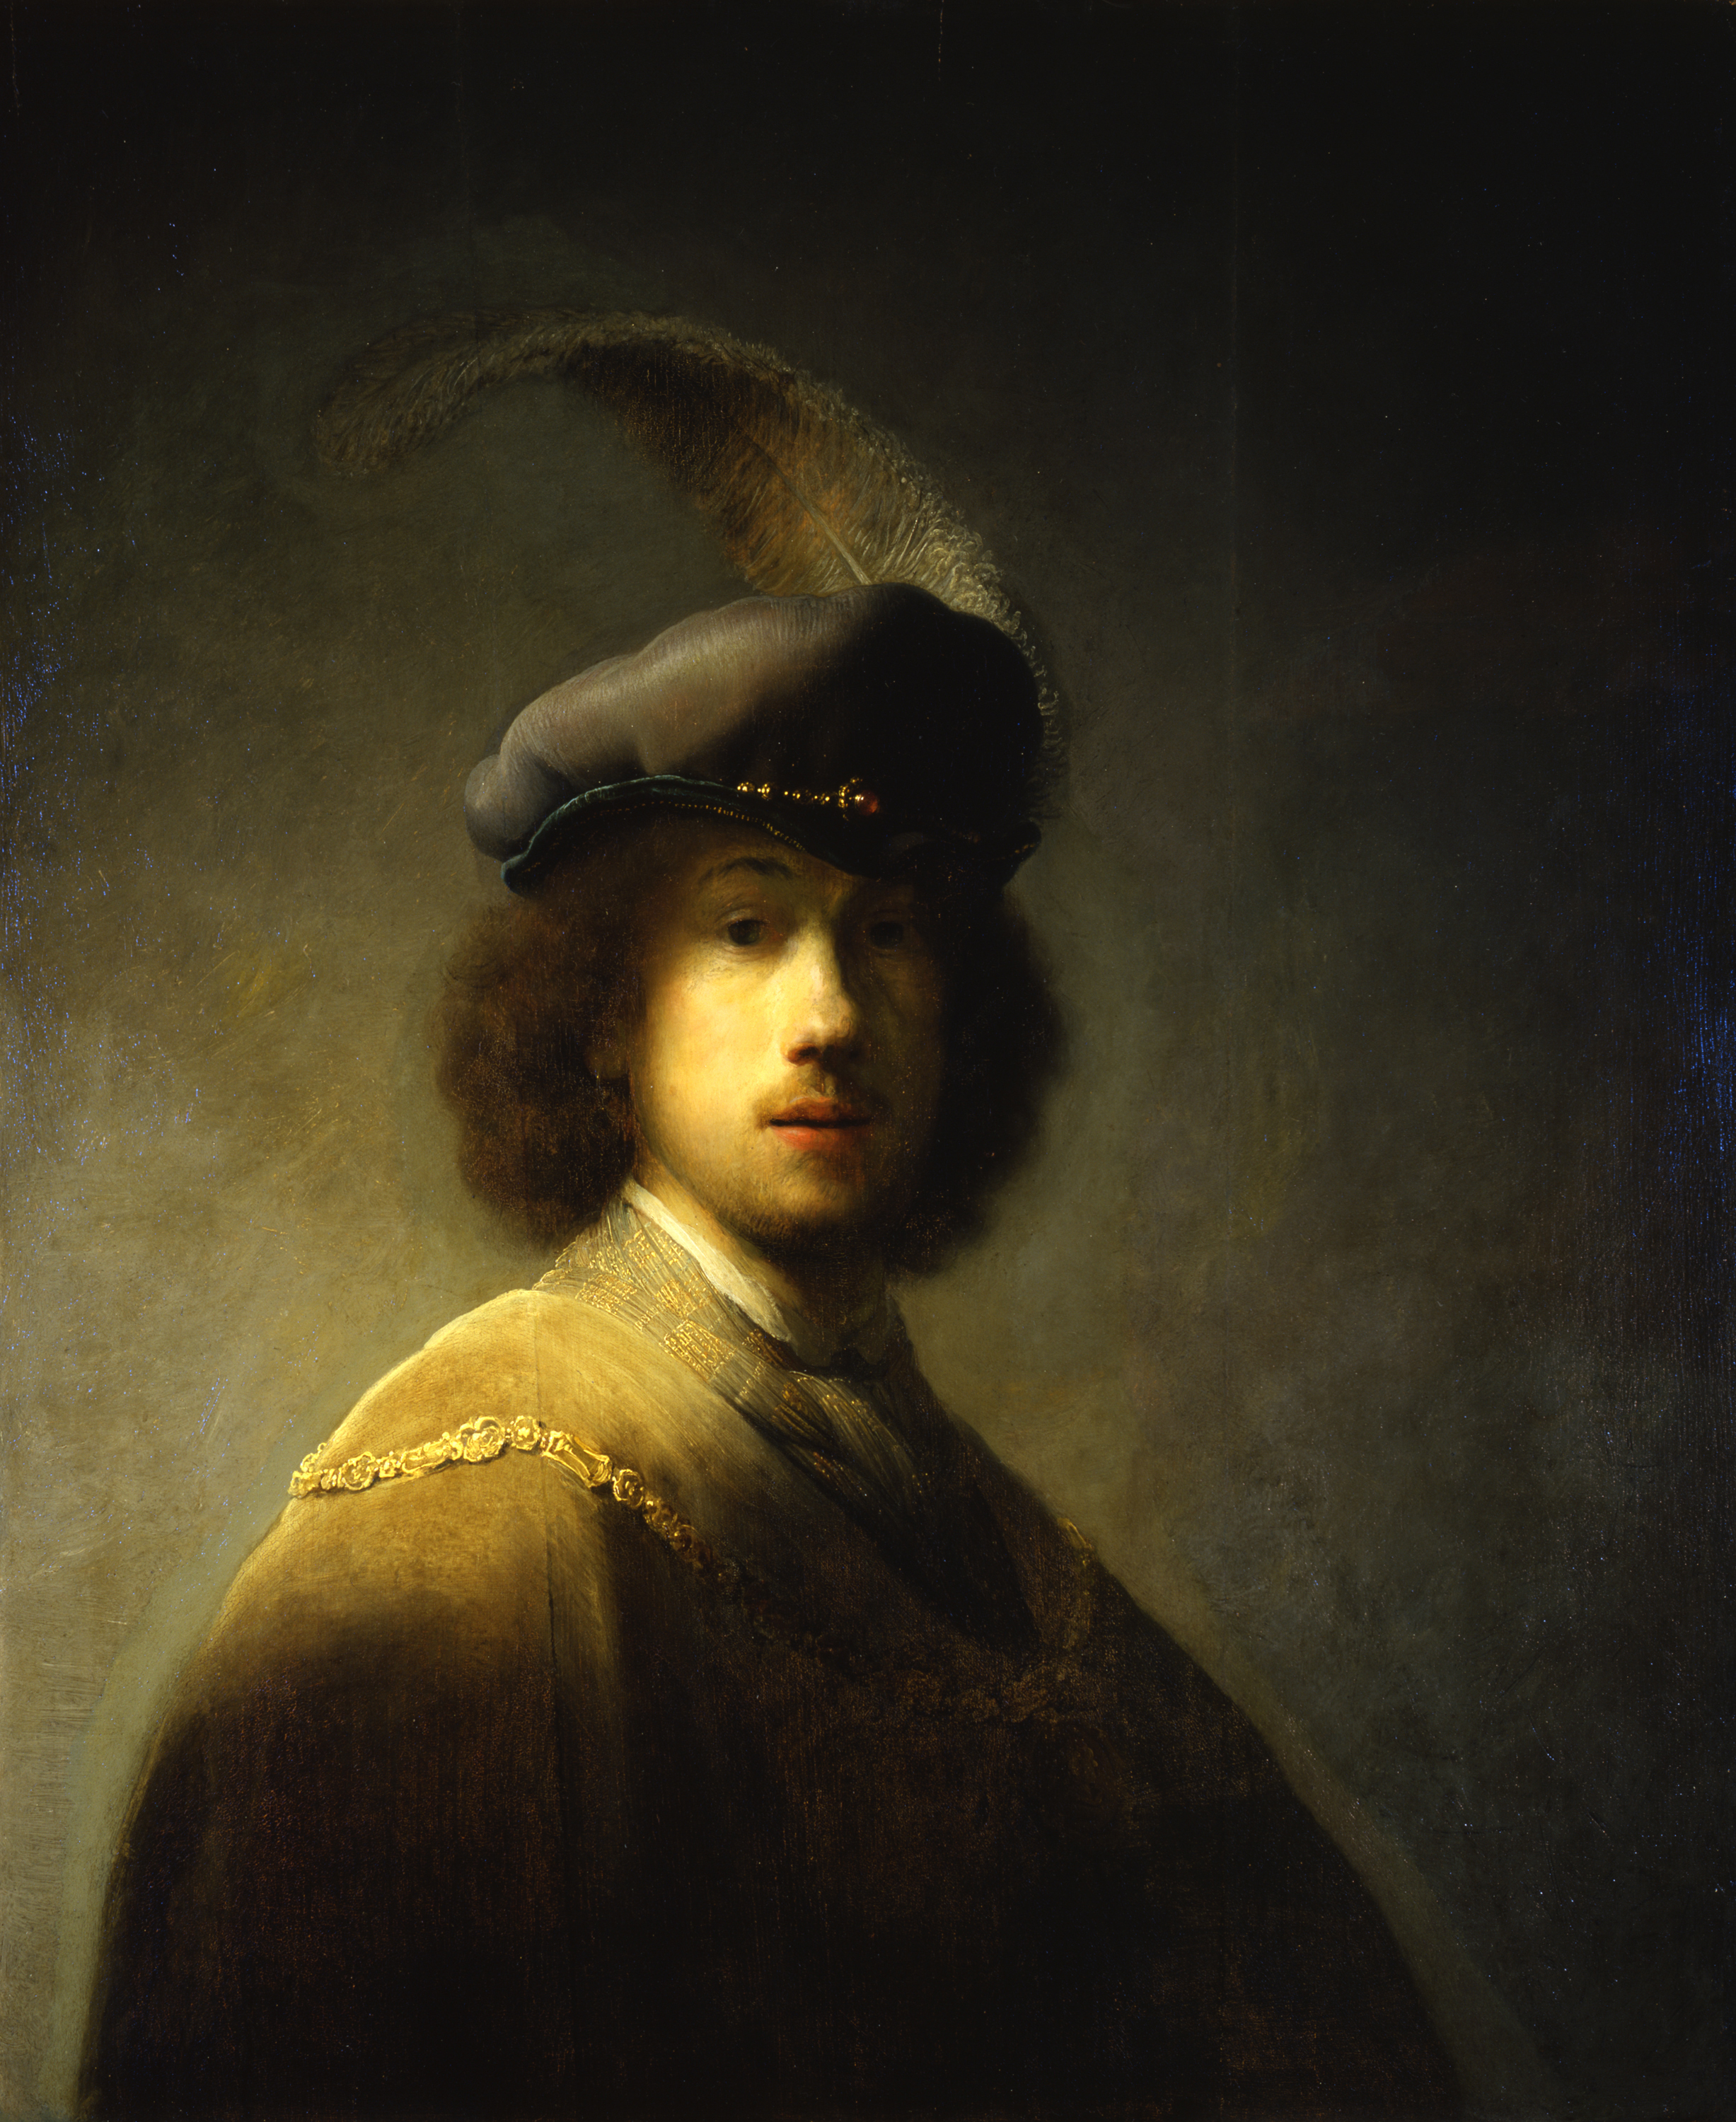
23TODO – Self-Portrait, Age 23
1629
Rembrandt, Dutch, 1606-1669
Oil on wood, 89.7 x 73.5 cm (ISABELLA STEWART GARDNER MUSEUM)
The way this is handled in the CGI world, where we have to try and build a representation of skin that aspires to work under any lighting condition, is the “skin shader”. The default one in Arnold is illustrated well in their documentation here:
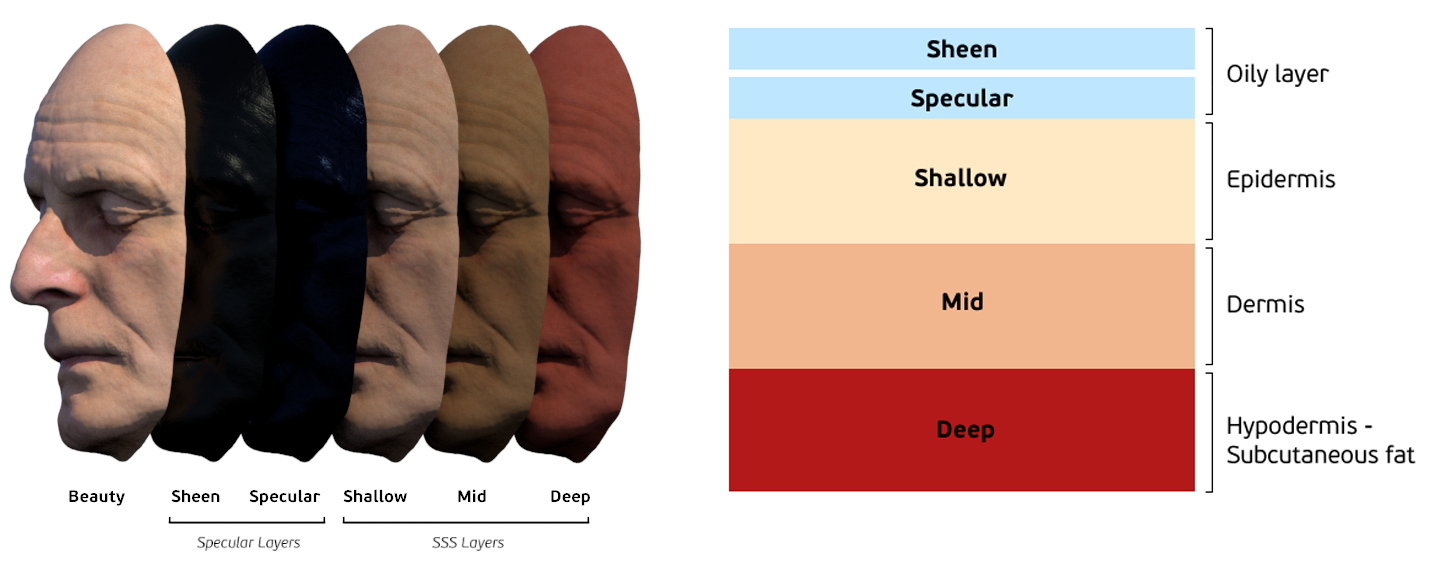
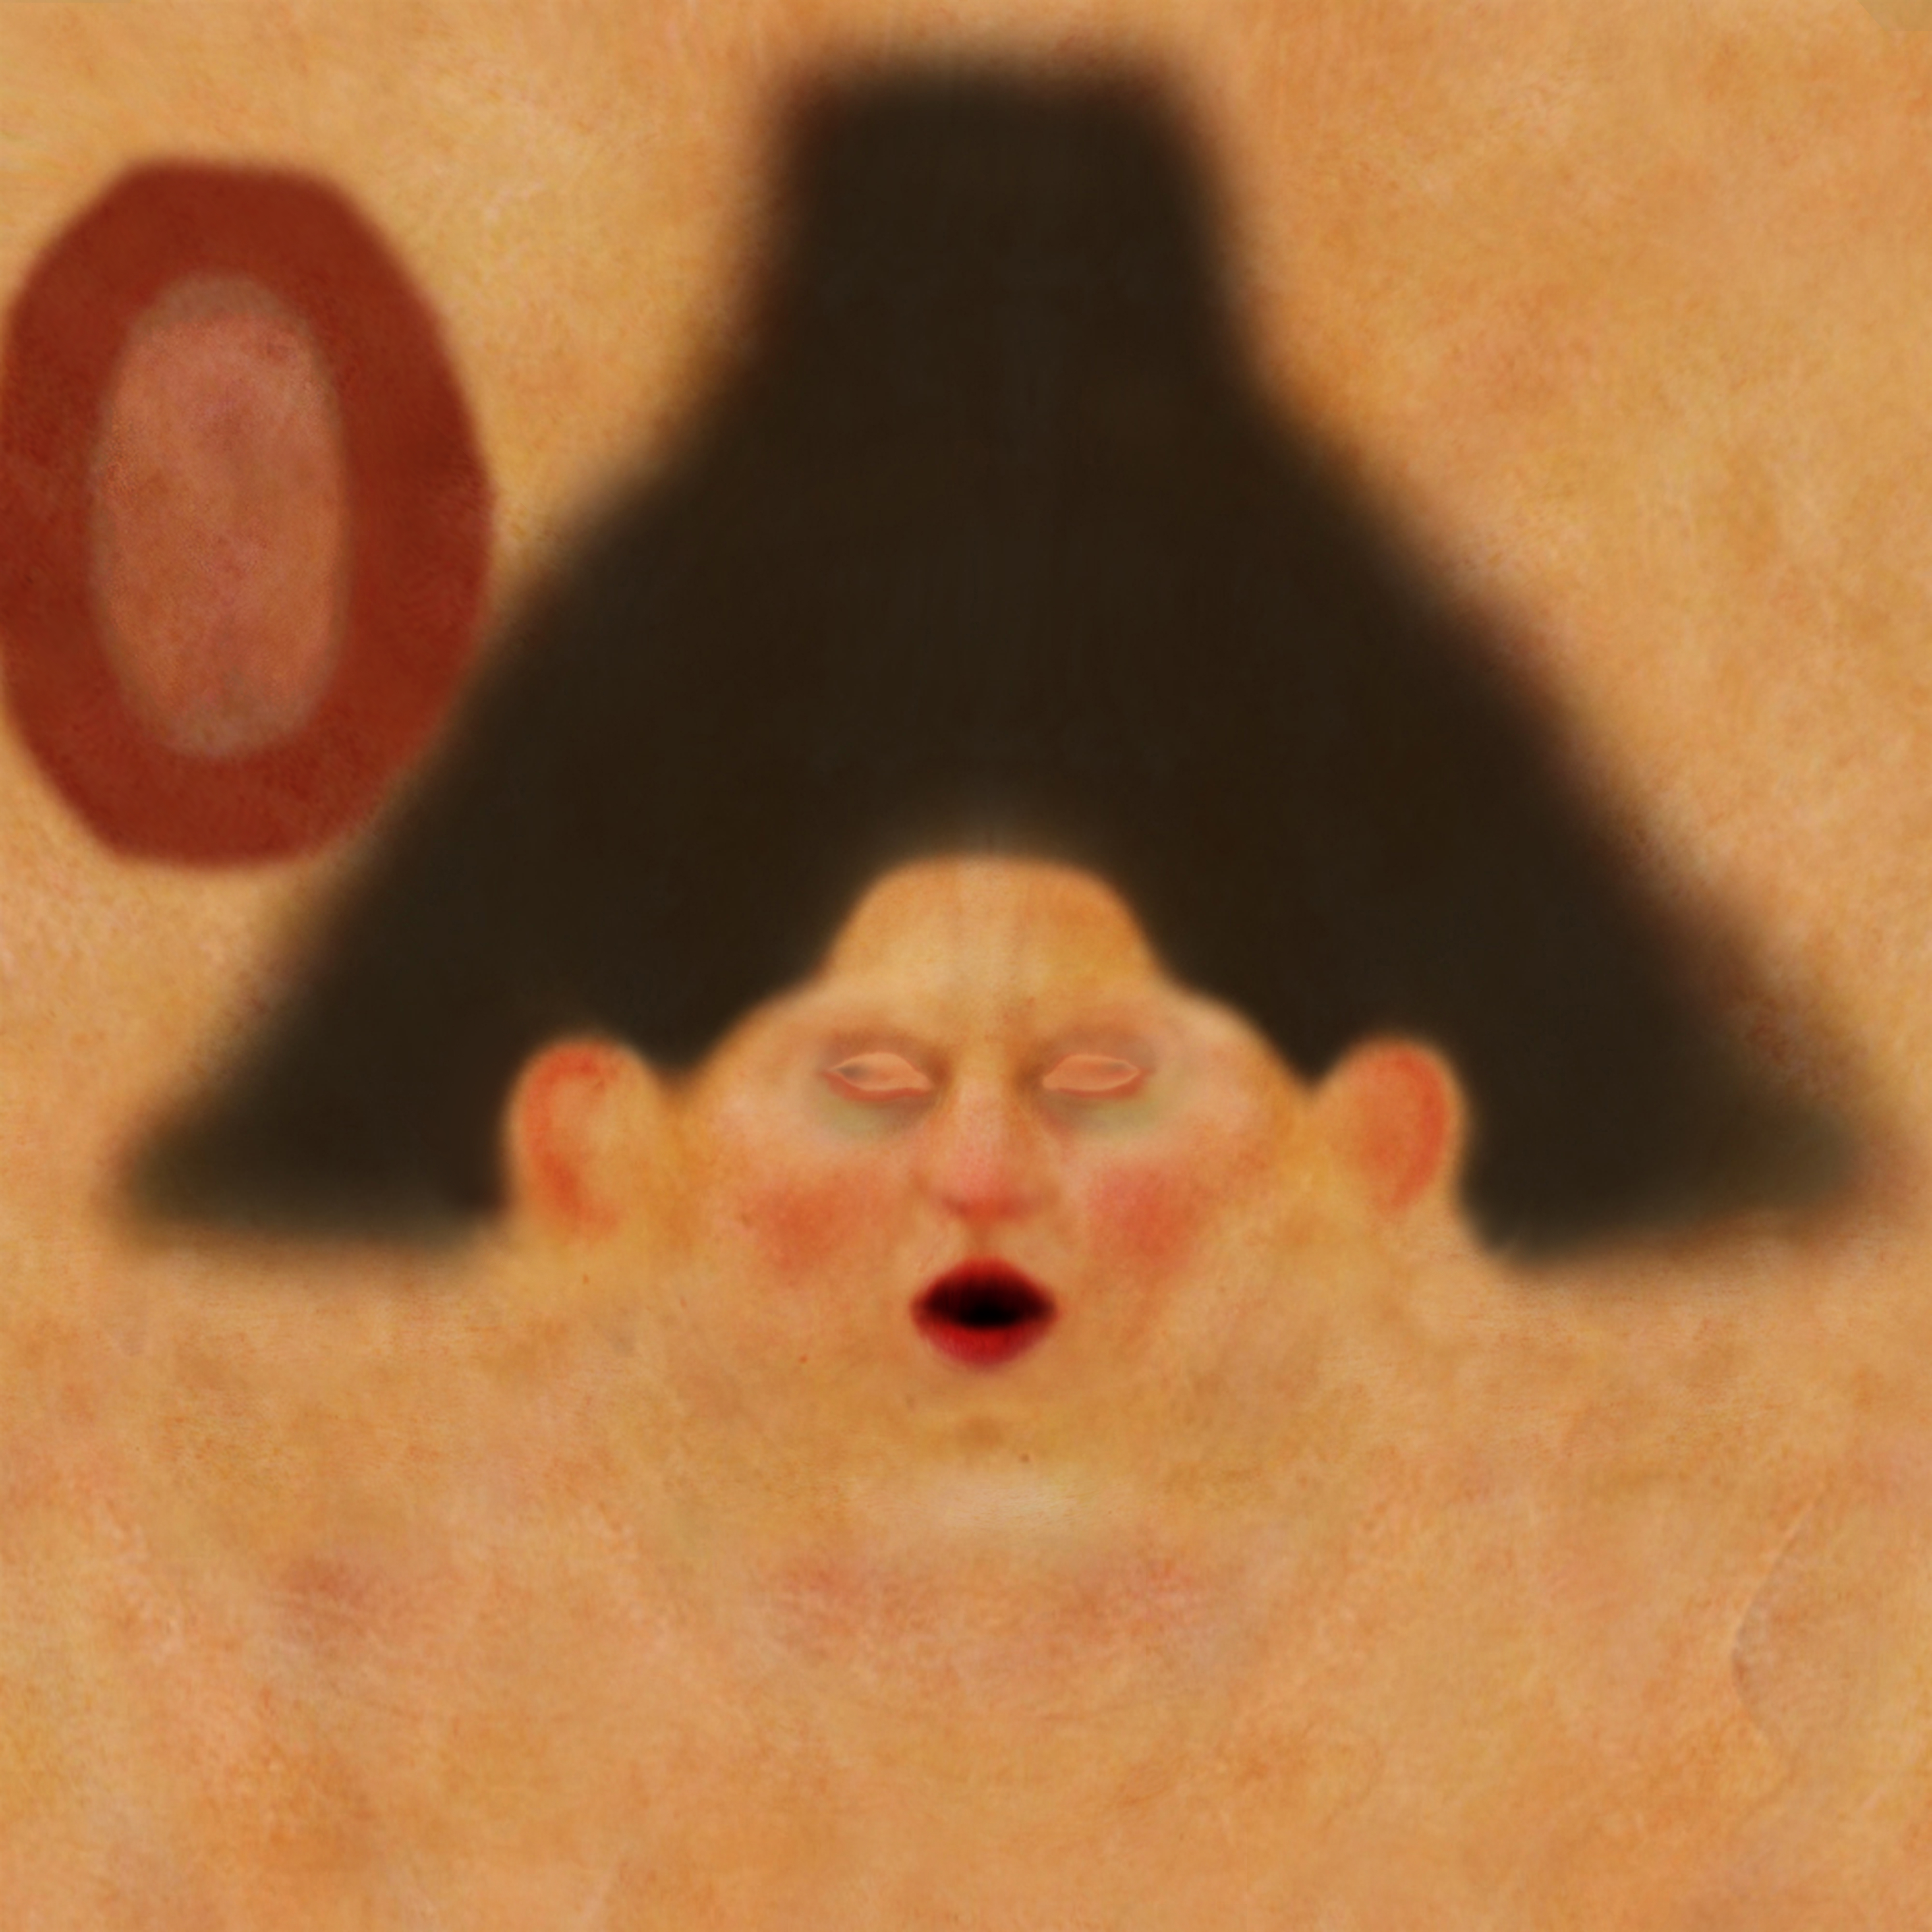
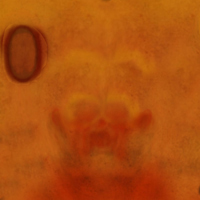
They allow for 5 layers in total to build up the final look. Almost like layering translucent paints over each other to get a final colour. They have two reflection layers “sheen” and “specluar” that allow for the oliy sheen that covers the whole face, and another layer of shine for moist areas such as the mouth and eyes, as well 3 layers of colour at different skin depths. Here is an example of some of Stina’s early development colour maps unwrapped as single images. This first was used at the Dermis level, the second at the Subcutaneous level:
One key thing in developing shaders like this is consistency. We use a single lighting environment for all our shaders. It has a simple studio style 3 point lighting set up, and a High Dynamic Range map that simulates a realistic forest environment. This gives us a nice range of 2 extreme lighting conditions. It is very important that all the shaders are made under the same lighting situation, as if they aren’t its very easy to end up with shaders that react unexpectedly. We also use a neutral mid grey shader ball so we have a constant object for reference. Here are some test renders using our forest shader “Look Dev” scene:
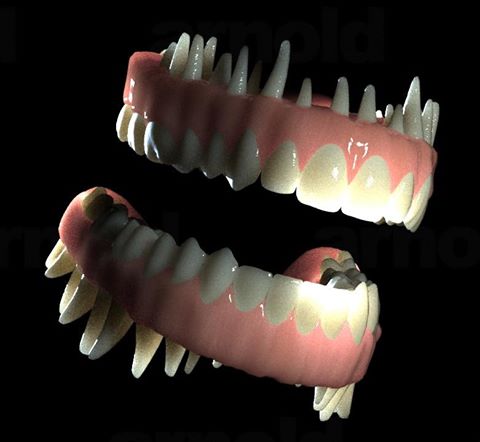
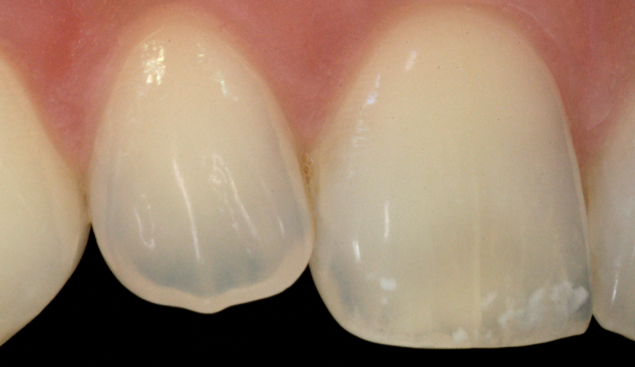
And here’s one using our studio lighting setup (notice the SSS on the teeth. I’ve posted a real photo also so you can see how we reference for the shader development. Reference is key to all of our shader work):
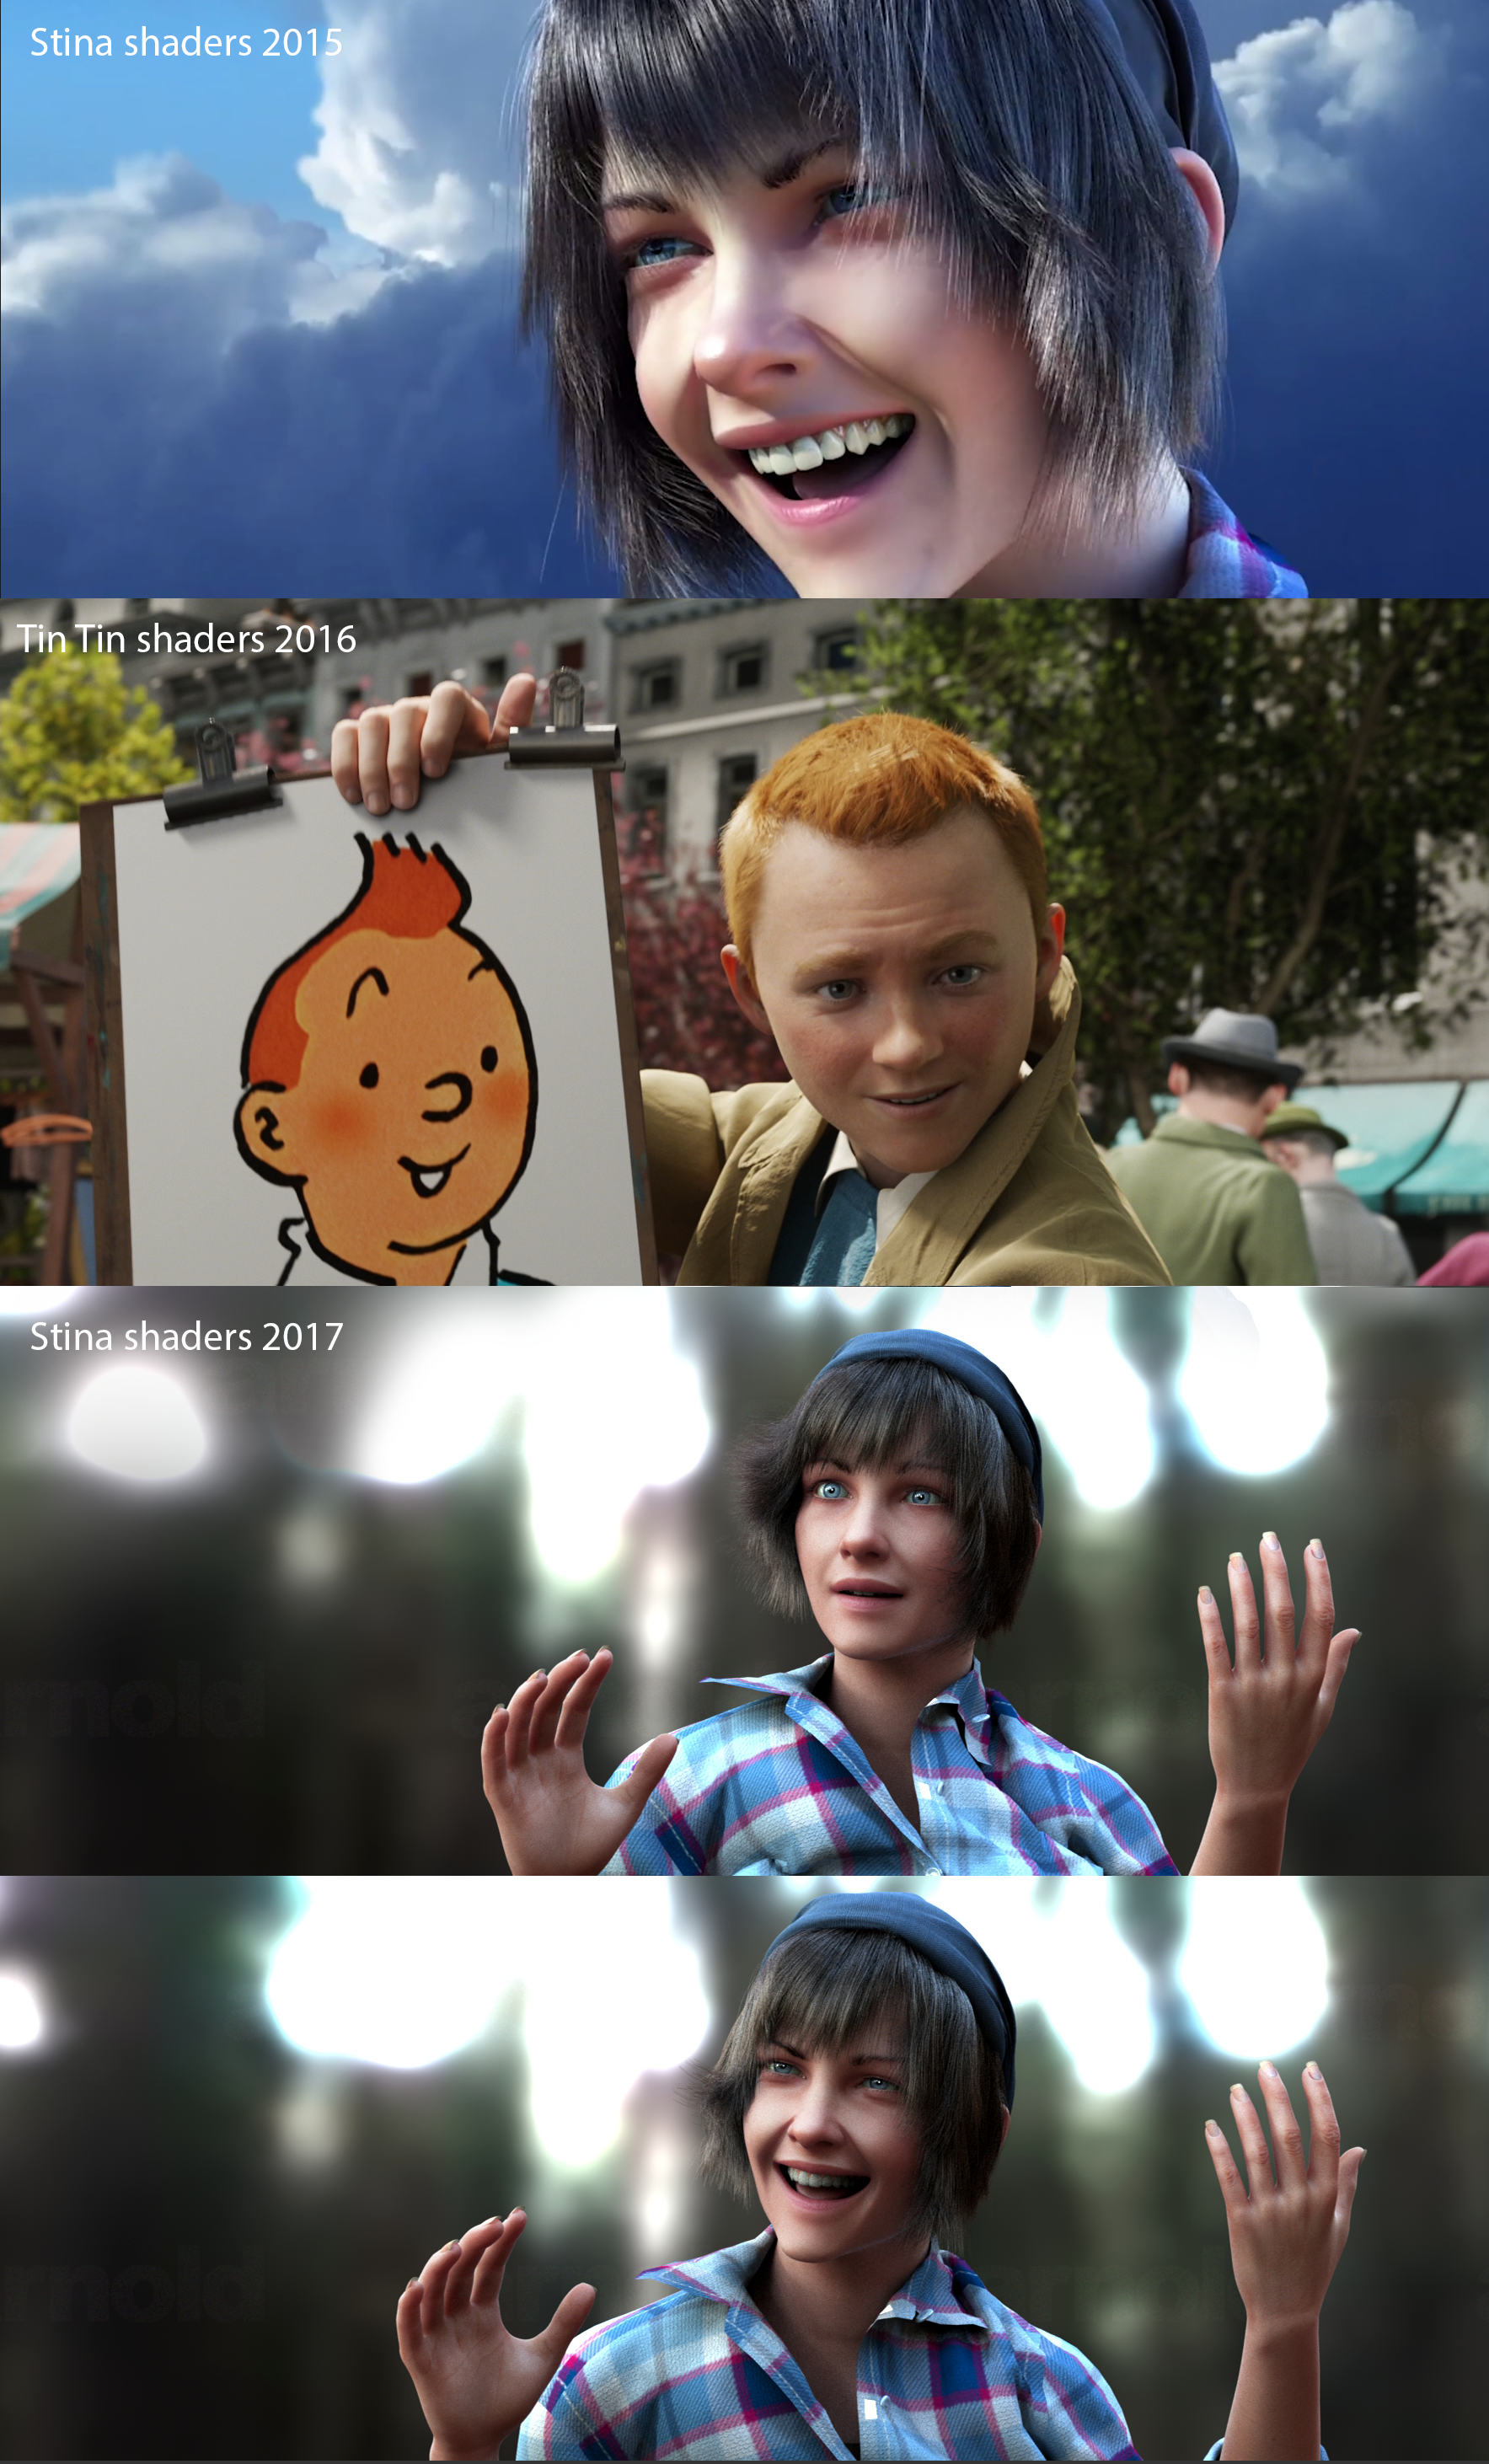
I shan’t go into the whole development process of the skin shader, as that’s an article in itself, but i’ll post an example below showing where we are now with the look development of it. I’ve also included a picture from the film “Tin Tin”, as the film we are making is similar in nature, in that we are trying to find a middle ground between realism and sylisation, which is very tricky! Broadly speaking, we are trying to achieve “hyper realism”: exaggerating textural elements as a means to emphasis ideas in the story; making her skin slightly too perfect, too translucent, too opalescent, her eyes slightly too intense in the way they catch the light. It’s a slow and iterative process and experimentation is the key. We are now at the point where we are hovering at the door of photo realism, possibly even more than “Tin Tin”, and will use the short film to see how well this works with the animation, as a moving shader is quite a different experience to a cunningly framed still, particularly when its talking!